
[ad_1]
Landscapes have to be one of the most accessible and enjoyable genres that photography can offer, so it’s no surprise that it’s hugely popular. However, taking a large landscape can be trickier than initially thought, as the lighting, composition, and photo equipment can all put a damper on the action.
So we caught up with UK-based professional landscape photographer Bilal Hussain so he could enlighten us on which kit to buy and the best tips for winning landscape images.
• Find out more: Best tripod heads for landscape photography
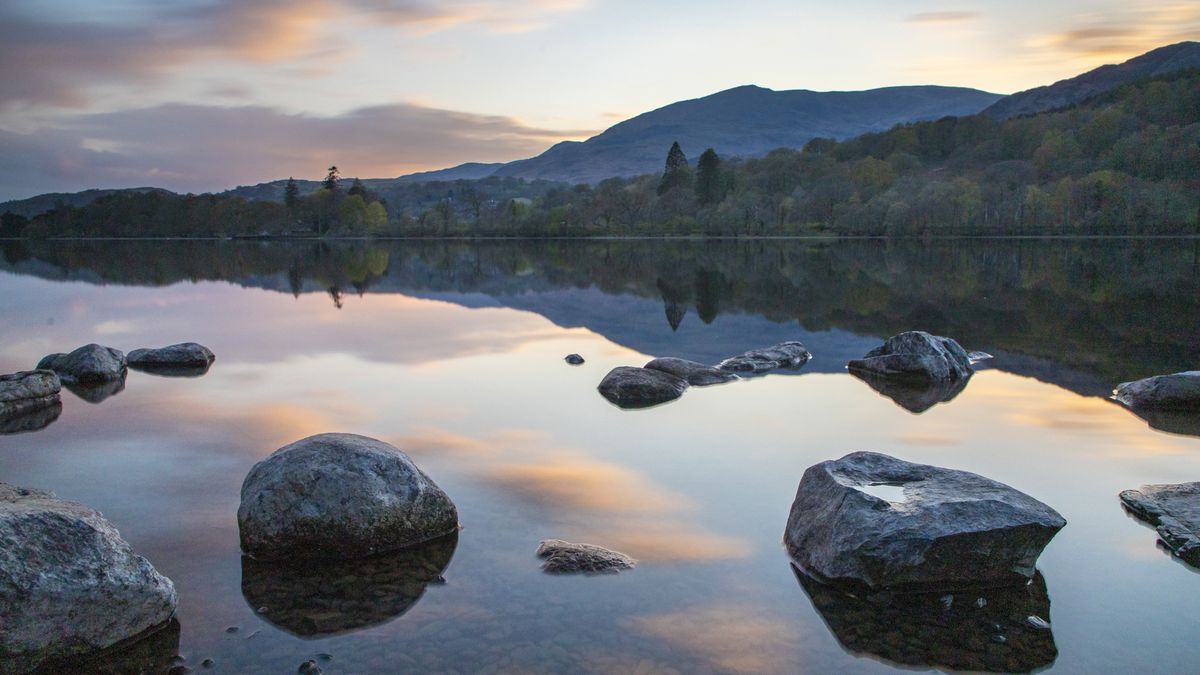
Bilal is a photographer and dental surgeon who loves nothing more than relaxing outside with his camera in his spare time. He has taken photos from scuba diving to soaring Cessna planes, and has a very adventurous spirit. He has visited every continent on the planet and yet, as traveled as he is, the Lake District in the UK is still one of his favorite places to turn.
We paired it with PhotoPlus reader: The Canon Magazine, Adrian Thomas. Here you’ll find Bilal’s top 10 landscape tips, along with some of the images Adrian was able to take applying them to his own photography.
You can read more about Bilal’s work on his website.
01 Dial some key parameters

To begin with, Bilal put Adrian’s camera in manual mode and set a shutter speed of 1/160 sec to suppress camera shake when shooting handheld. An aperture of f / 11 was used for decent sharpness throughout the scene, and an ISO of 100 would provide the best image quality with low noise levels. Manual mode will also allow Adrian to lock the settings, meaning they don’t change between frames even if the light is slightly different.

02 Check the histogram

Bilal advised Adrian to always check his images on his camera’s rear LCD screen to make sure they are sharp and properly exposed. He made the histogram appear on Adrian’s camera in playback mode to check the exposure – if the histogram is clustered tightly to the left or right, it means your photo is over or underexposed and that you have lost details. If either of these is the case, it’s best to adjust your exposure to retain more detail.
It’s also worth shooting in raw format to record as much exposure information as possible at the time of capture.
03 Use L-bracket for easy framing

Bilal uses an Ellie L 3 Legged Thing Mount, which is compatible with his Canon EOS 5D Mark IV and allows him to quickly switch his camera between portrait and landscape orientation, using the Arca Swiss connection on his tripod. Its L-plate is also bright orange, making it easy to find in its kit bag when shooting in low light!
• Better L-bracket for your camera

04 Invest in a high quality filter set

Bilal uses a whole range of NiSi filters with its 16-35mm wide angle lens. It still has a circular polarizer attached to help reduce glare in the water or amplify blues in the sky. It also has a portafilter to which to add its 10-stop NiSi neutral density filter, which blocks 10 stops of light, turning a regular shutter speed of 1/30 s into 30 s, blurring the moving elements in the light. scene.
• The best neutral density filters
• The best polarizing filters

05 Get a wide angle lens

Any optic with a focal length of less than 50mm is considered a wide angle because it offers a wider perspective than what the human eye can see. This makes them perfect for sneaking into sweeping vistas. Bilal’s wide-angle optic of choice is the Canon EF 16-35mm f / 2.8L USM, which has a super-wide 16mm tip and can be zoomed in to 35mm for less distortion. It also has a front filter thread, so filters can be applied easily.
• The best wide angle lenses
06 Go mono

Landscapes lend themselves well to black and white processing, so it may be a good idea to make your Live View mono, which will help you visualize your scene without color.

On a Canon camera, for example, this can be done by changing the Picture Style in the menu and will allow you to compose your scene focusing on the shape and contrast in the frame, rather than the colors. If you shoot in Raw, you will always have access to the color version if necessary.
07 Use a trigger cable for long exposures

Bilal uses a shutter release cable that plugs into his camera body and allows him to trigger the shutter remotely, to prevent camera shake when pressing the shutter button on the camera .

A trigger cable also allows you to lock the trigger. This is useful when shooting in Bulb mode, as the shutter will stay open as long as the shutter is pressed so that you can take exposures of several minutes, rather than the original 30 seconds – the time it takes. maximum exposure that many cameras exceed. out to otherwise.
• Better camera remotes and cable triggers
08 Get an aerial perspective with a drone

To get a new perspective, Bilal often brings his DJI Mavic Pro drone with him when shooting landscapes to get an angle that you just can’t get from ground level like this moody high angle shot and atmospheric targeting the lake at Coniston Water.

A fully charged battery gives around 20 to 30 minutes of flight time, although Bilal always has spare batteries to keep his drone running if a battery is completely discharged. Always stay up to date with the latest drone flight laws in your country. If you’re in the UK like we were for this Lake District shoot, check out the CAA website www.caa.co.uk
• The best camera drones
09 Use photo apps

Bilal uses the photographer’s Ephemeris app on his phone to determine the direction in which the sun sets and rises throughout the day. One of its brilliant features is that you can drop a pin anywhere on the map and it will show you which direction the sun will approach throughout the day. This makes it an incredibly powerful tool for planning landscapes because you can determine where you need to be to capture your scene in the best possible light.
• Best photo apps
10 Get a professional tripod

As a savvy explorer from all corners of the globe, it’s no surprise that Bilal’s tripod is the Gitzo GT2545T Traveler, which folds down to just 44.5cm and can be extended to 154.5cm. It also supports up to 12kg of kit! More than enough, even for Bilal telephoto zooms. He paired his tripod with a Gitzo ball head so he could make adjustments quickly, unlocking and locking the composition with just one button.
• The best tripods for photography
• Better ball joints for tripods

Read more:
Best cameras for landscape photography
The best lenses for landscapes
Photography tips
[ad_2]